Showing posts with label Tutorial. Show all posts

Sunday, February 1, 2015

"More Than One Score at Scor-Pal" Challenge - Hearts a Flutter

A new month means a new challenge at More Than One Score at Scor-Pal and this time we are looking for your "Hearts A Flutter" themed projects.
You make an "Anything But a Card", a card with a fancy fold, anything as long as it has more than a single score and that you let us know where you used your Scor-Pal in the project.

This year we are rotating our design team so that each one gets to be in charge of the theme of the challenge and for this one is was my turn so you get the tutorial to go with the card and I hope you enjoy it.

I have chosen to make a tent card, it's not too hard to master and the aperture in the front is perfect for "swinging" item and that fits great with "fluttering" part of the theme!


Card Recipe:
Scoring Tool - Scor-Pal Eighths Board
Adhesive - Scor-Tape
Paper and Sentiment - Natural Luxury by Craft Smith
Square Dies - Little B's
Heart Punch - Martha Stewart
Brads and Picture Hanger - Craft Store


Cut two pieces of patterned paper 6" by 12" and 6" by 4"


Score the larger piece at 6" along the 12" and score the smaller piece at 1", 2" and 3" along the 4" side. Fold the card base in 2 and the smaller piece in a "hill and valley" fold as shown in the photo. Burnish all score lines.


Chose a die to cut the aperture on the front of your card to fit your sentiment or embellishment that you wish to hang. If you do not wish to use a die for this you can cut the hole with an exacto knife and a ruler.


Position the die on the card front (card open so as only to cut the hole in the front) and run through the die cut machine.


The die I chose came as a set so I used the original die along with 2 others to cut a frame to go around the edge of the aperture.


Decorate the card as you desired before adding the base. If you choose a double sided cardstock the inside will already be decorated for you. I added a message mat to the inside, you could add it to the back of the card if you prefer. Attach your sentiment or embellishment so it can dangle in the front space, I used two picture hangers but you could use wire, twine, ribbon, chain, whatever you have on hand that goes with the theme of your card.


Add Scor-Tape to the base as shown in the photo.


Attach to the inner sides of the card with the "mountain" fold in the center going upwards so that the card will fold closed flat.


Add any additional embellishments to the card to complete it.


I hope you have enjoyed this little tutorial and that you will give a tent card a try, they are easy to make, fold flat into an envelope and are a fun twist on a regular fold.
And remember to share you "Hearts A Flutter" creation at More Than One Score at Scor-Pal and you could be our winner!


Katie

Challenges:
Crafty Hazelnuts Patterned Paper - Patterned Paper
Wags N Whiskers - Hearts (2 entries only)
Crafty Sentiments - Love/Valentines (1 entry only)
Papertake Weekly - Take Your Pick (Fancy Folds)
Crafty Creations - Something Old, Something New (old is heart punch and picture hanger, new is the paper)
Scrapy Land - Spots (die sold by Scrapy land is Little B's)
Creative Moments - Anything Goes (3 entries only)
Baffies Keativladen - Anything Goes

Monday, September 22, 2014

Halloween House - Fall/Halloween Scor-Pal Tutorial week

Today is Day 1 of a week of Fall/Halloween tutorials at Scor-Pal
My tutorial is for a cute Halloween House, perfect for hiding treats in!


Project Recipe:
Cardstock and Patterned Paper - Unknown
Scoring Tool - Scor-Pal
Adhesive - Scor-Tape
Fence Punch - Martha Stewart
Scalloped Punch - Fiskars
Pumpkin Dies - Dayco


Take 2 pieces of cardstock 5" by 12" and score at 1" with the 5" side at the top fence and then at 1", 5" and 11" on the 12" side.


Burnish all scored lines and snip as in the photo to create flaps.


Add Scor-Tape to the flaps to form the base of the house.


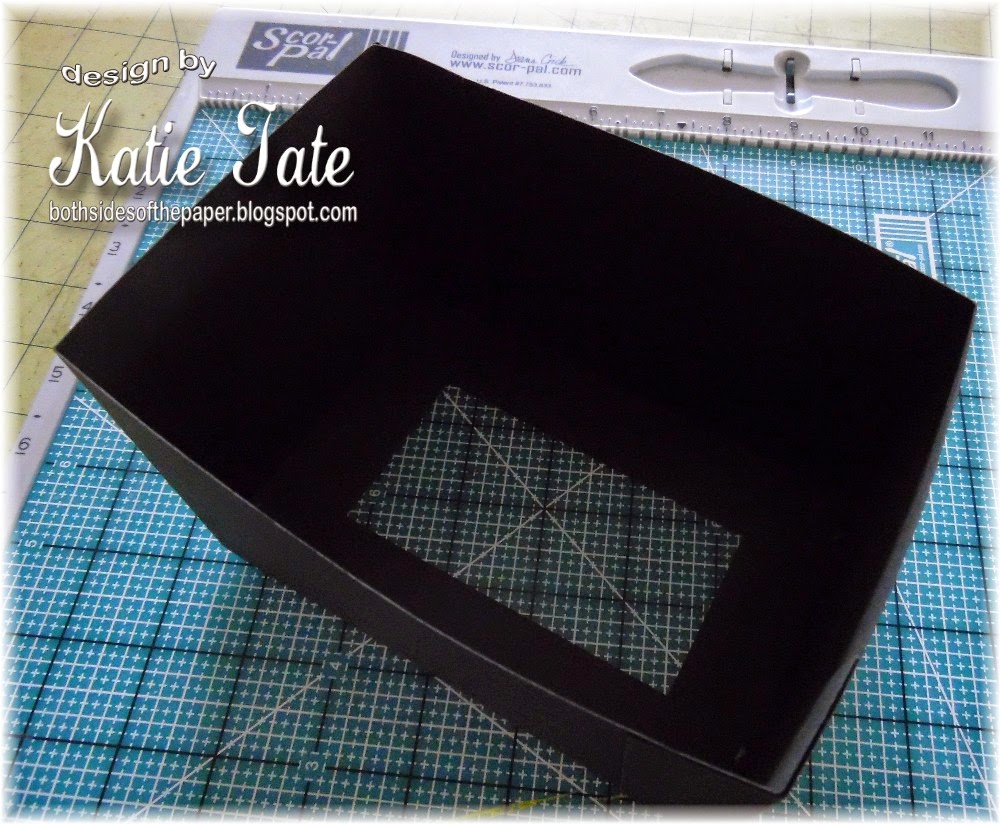
Form 2 sides of the house using one piece of the cardstock and your Scor-Tool to create crisp corners


Repeat with the other piece of cardstock and attach together to form the 4 walls of the house. (don't worry about a base it will come later) Your house will measure 6" by 4"


Punch a 12" strip with your fence punch from a full piece of cardstock. After punching trim to a height of 2" on a trimmer. Then on your Scor-Pal score a line 1/4" from the bottom of your fence and burnish. These measurements will vary depending on what you use for your fence. Just remember that you need to leave room to be able to form a flap that will attach to the base.


Repeat with other strips until you have enough to go around the base of your house. Form corners as in the photo. I wanted my base to measure 6 1/2" by 5" and adjusted the punched pieces to fit (with their repeating design matching up) and trimmed to form a gate space (so the trick or treaters can visit the house :).


Attach the base to the fences with Scor-Tape


The house will fit to the base. You will attach with Scor-Tape later after decorating.


To make the roof start with a piece of cardstock 4 1/4" by 8" and score at 8" on the 8" side and burnish.


For the sides of the roof have 2 pieces of cardstock 5 1/2" by 4". At the center point on the 5 1/2" side (so 2 3/4") mark with a pen. Draw 2 diagonal guide lines from the that point to each bottom corner. Use those lines as a guide to line up on your Scor-Pal and score the diagonal lines and burnish.


Attach the roof sides at one side to the roof top as in the photo. Sorry it is hard to see, it is hard to edit it lighter with it being a black roof.


Trim off the overlap so that the sides match the level of the roof. It is so much easier to do it this way as the scored diagonal lines are easy rather than have to measure in on the sides before scoring and you are much less likely to make a mistake. Also trim the tiny piece that overlaps on the front too (I left it on the photo so you could see what I was referring to)


Attach the other side of the roof and use your Scor-Tool in the corners to complete the roof.

Now decorate the house as you desire.


The roof is easily removed to add treats if you would like or you could use it as a gift box.


I hand cut windows and a door and found this little round sticker that I thought looked a little like a wreath to fit on the door. You can decorate how you like.


I hope you enjoyed this and be sure to drop me a message if you have any questions.

Katie


Challenges:
A Girl Who Crafts - Anything Goes (5 entries only)
Ladybug Crafts - Anything Goes (3 entries only)
613 Avenue Create - Anything Goes
Ruby's Rainbow - Anything Goes
Crafty Boots - Anything Goes
DL Art - Anything Goes (one entry a day)
4 Krafty Girlz - Anything Goes (3 entries only)
A Creative Romance - Anything Goes (3 entries only)
Nutcrafters - Anything But Square
Not Just Cards - Anything Goes (not cards)
Decorate to Celebrate - Anything Goes (decoration/not a card)
All Crafts - Anything But a Card
Dragon's Lair - Anything But a Card
Divas by Design - Anything But a Card
Hobby Cutz - Not a Card
Crafty Hazelnuts Patterned Paper - Patterned Paper
Corrosive - Autumn/Fall (3 entries only)
Craftin Desert Divas - Fall
Great Impressions - Get Your Spook On
One Crazy Stamper - Halloween/Christmas (no digi)
Come and Get It - Use 3 of Something (3 pumpkins)
Robyn's Fetish - Die or Punch


Saturday, August 23, 2014

Backpack Gift Bag - Scor-Pal™ Back to School Week Tutorial

It's my turn to share a tutorial for "Back to School" week at Scor-Pal!
I decided to go with a backpack style gift bag, perfect for a little gift for your favorite teacher to start their year off right.


Project Recipe:
Scoring Tool - Scor-Pal
Adhesive - Scor-Tape
Paper - The Grade School Stack by DCWV
Ribbon - Really Reasonable Ribbon


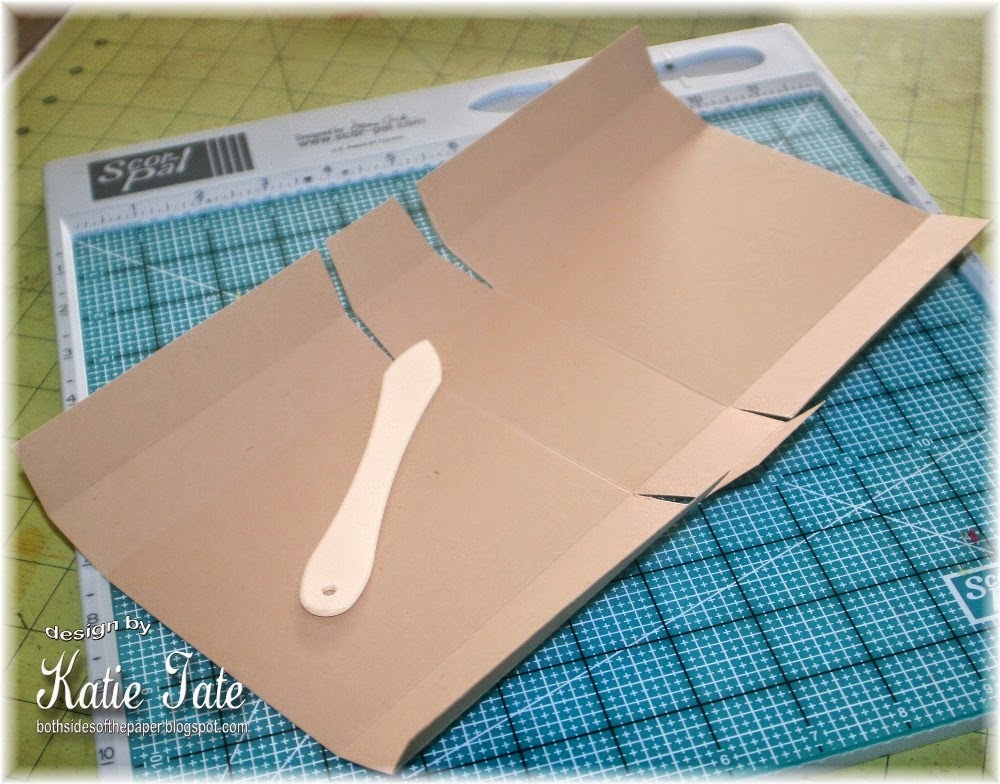
The backpack starts with cardstock 12" by 8". On the 12" side score at 5" and 7". Rotate to the 8" side and score at 1", 2", 6" and 7"


Burnish all score lines and snip on the flaps as in the photo


Score on the center of the flaps and bend inwards as in the photo.


Remove one flap from the each side (opposite sides) on the long side as they make the sides too stiff to fold. Add Scor-Tape to the flaps as shown.


Remove the cover on the Scor-Tape and adhere the sides to form the gift bag.


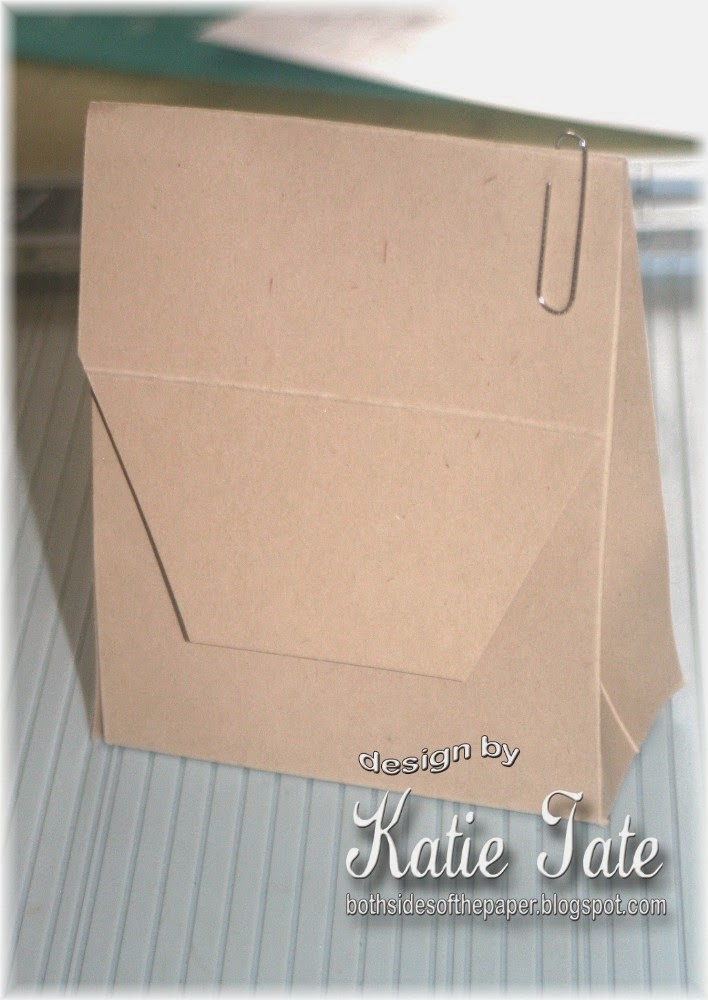
To make the flap use a piece of cardstock 5" by 4", score at 1" and 3" on the 5" side. (I will admit I would make this a little shorter next time but wanted to show exactly how this one was made). I would have scored at 1" and 2" and made the length 3" not 4". Angle the corners as shown in the photo.


The straps are made from 6" by 1" scored at 1/2" and 5 1/2"


Add Scor-Tape to the 1/2" flaps


Add the straps and then decorate to your style.


I made 2 slits in the flap and the backpack and threaded ribbon through to form a closure.
I hope you enjoyed this and have enjoyed all the projects this week, if you have missed any please go and check them all out.


Challenges:
All Crafts - Anything But a Card
Oldie but a Goodies - Anything But a Card
Craftin Desert Divas - Back to School
Di's Digis - Back to School
Whimsy Inspires - Back to School
Add a Little Dazzle - Back to School
Ruby's Rainbow - Back to School
CCEE Stampers - Back to School
Cute Card Thursday - Back to School
Bloggers Challenge - Back to School in Style
Wags N Whiskers - Back to School/For a Teacher
4 Krafty Girlz - Anything Goes (3 entries only)


Katie

Saturday, April 24, 2010

Pixie Cottage Tutorial - Fabric Flowers by Me!

Good Morning, I hope this will be a Super Saturday!
It's time for a new tutorial at The Pixie Cottage and this time it's done by yours truly!
A few weeks ago I did a card with a fabric rosette flower and I had some questions about how I made it and so that's what I'm showing you today.


First gather your things, you'll need:
Fabric (cotton or a cotton blend is easier to work with)
A needle and thread
Fabric scissors
Pins
Ruler
Embellishments


Cut your fabric into a strip 6" long by 2" wide.


Fold it in half along the long side with right sides out and pin together.


Sew along the bottom edge in a loose running stitch.


Gently gather the fabric up along the thread to draw it together.
Do this slowly and gently to make sure you don't break the thread or you'll have to start again.


Pull the thread to make the gather as tight as you can, again being careful not the break the thread.
Sew the two short ends together and tie off your cotton.


This is the unembellished flower.


Find an embellishment for the center.
You can use a brad, button, anything that works for your project. Brads are easy as you can stick the prongs through the tiny hole in the middle and then open them out on the other side.


The embellished flower.


Here are some in different sizes.
I'm not showing my completed project as it is for the upcoming challenge on Wednesday. We will be having another guest sketcher and this one is a superstar crafter!
I'd love to see your fabric flowers, give them a try and maybe they can go on your entry when the next challenge is revealed ;)
Have a great weekend.
Katie